This guide will help you in creating a bootable Windows 7 USB Drive, this is really useful when your DVD drive is broken or you’re working on a computer that doesn’t have a DVD drive and the only thing you have is a USB Drive. This walk thru will go into some details with what commands do to get a better understanding.
So the list of things we need is:
1. A machine that is running Windows 7.
2. The DVD of Windows 7.
3. A USB Drive that is about 8gb+.
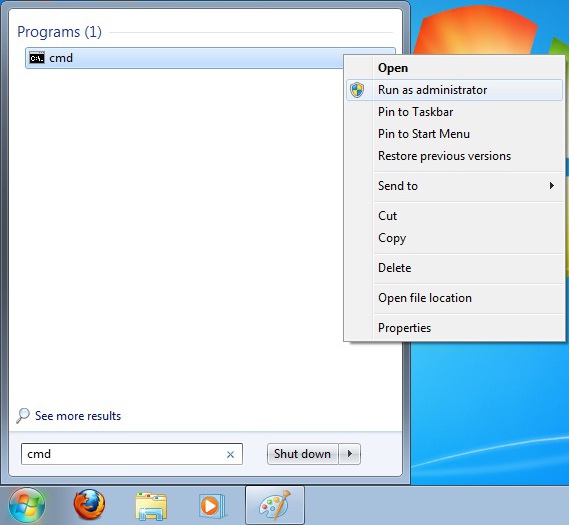
Step 1: Windows Globe > Search field type “cmd” > Right click on cmd and click “Run as administrator.”
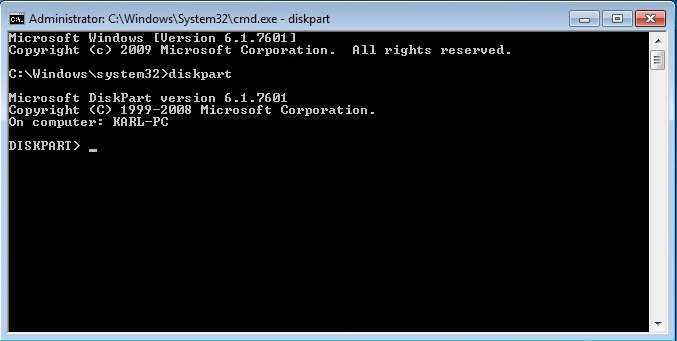
Step 2: Inside the command prompt we want to use “diskpart”. Diskpart is a command line utility like Disk Management, but diskpart according to Microsoft, “Enables explicit control of partitions and volumes.”
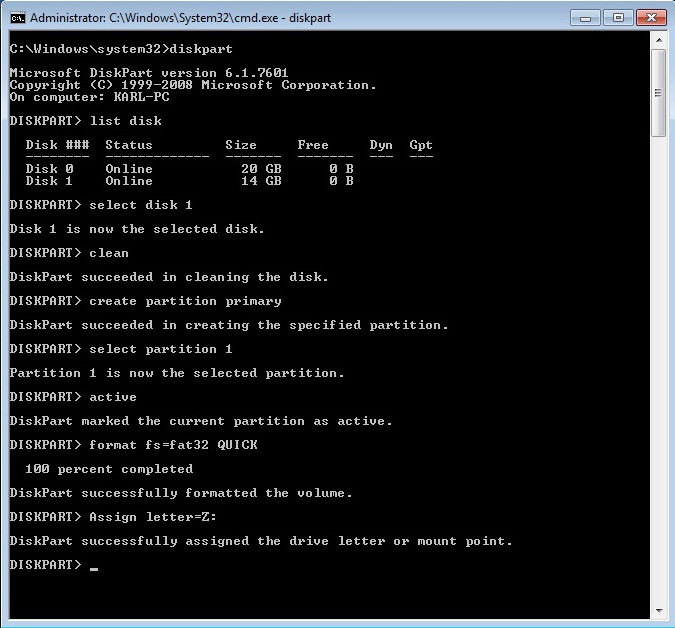
Step 3: List disk (This will list all the devices connected IDE, SATA, SCSI, USB, and etc. Pay attention to the size colum to get the right disk, in my example Disk 1 is my 16gb USB Drive.)
Step 4: Select disk 1 (Will put us in control of the USB Drive.)
Step 5: Clean
Step 6: Create partition primary (This creates a primary partition on the USB Drive.)
Step 7: Select partition 1 (We now select the first partition that we just created.)
Step 8: Active (The current in focus partition is active and tells the firmware that this is a valid system partition.)
Step 9: Format fs=fat32 QUICK (The command will format the current selected partition into a FAT32 filesystem and it will also format it quickly.)
Step 10: Assign letter=Z: (This assigns the drive letter will be Z: so I can remember which drive is the USB.)
Step 11: exit
Step 12: This is the part that your actual Windows 7 disk will come in handy, we need to use to the command called bootsect located on the Windows 7. In most cases CD/DVD Drives are located as D Drive, inside my Virtual Machine my DVD Drive is Drive D: if your Drive is at a different location substitute it the correct drive letter. cd D:\boot
Step 13: Once we are in inside the boot directory of the Windows 7 DVD we can now use the bootsect command so go ahead and type this command: bootsect /nt60 Z: This will finally create a bootable USB Drive that we can boot too.
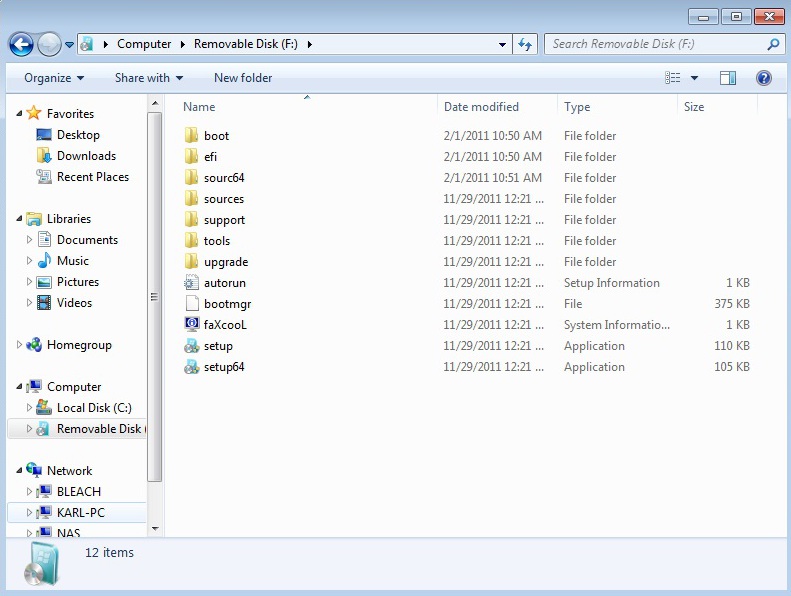
Step 14: Copy everything from your Windows 7 disk to the USB Drive.
Step 15: Restart your computer and make sure you boot from USB.
The end result will be that the computer will start the Windows 7 installer and act just like the DVD. The next goal I have is to try and figure out how to make a bootable USB drive with different Windows on it with Linux so that way I can have access to lets say Windows XP, Windows Vista, and Windows 7.


